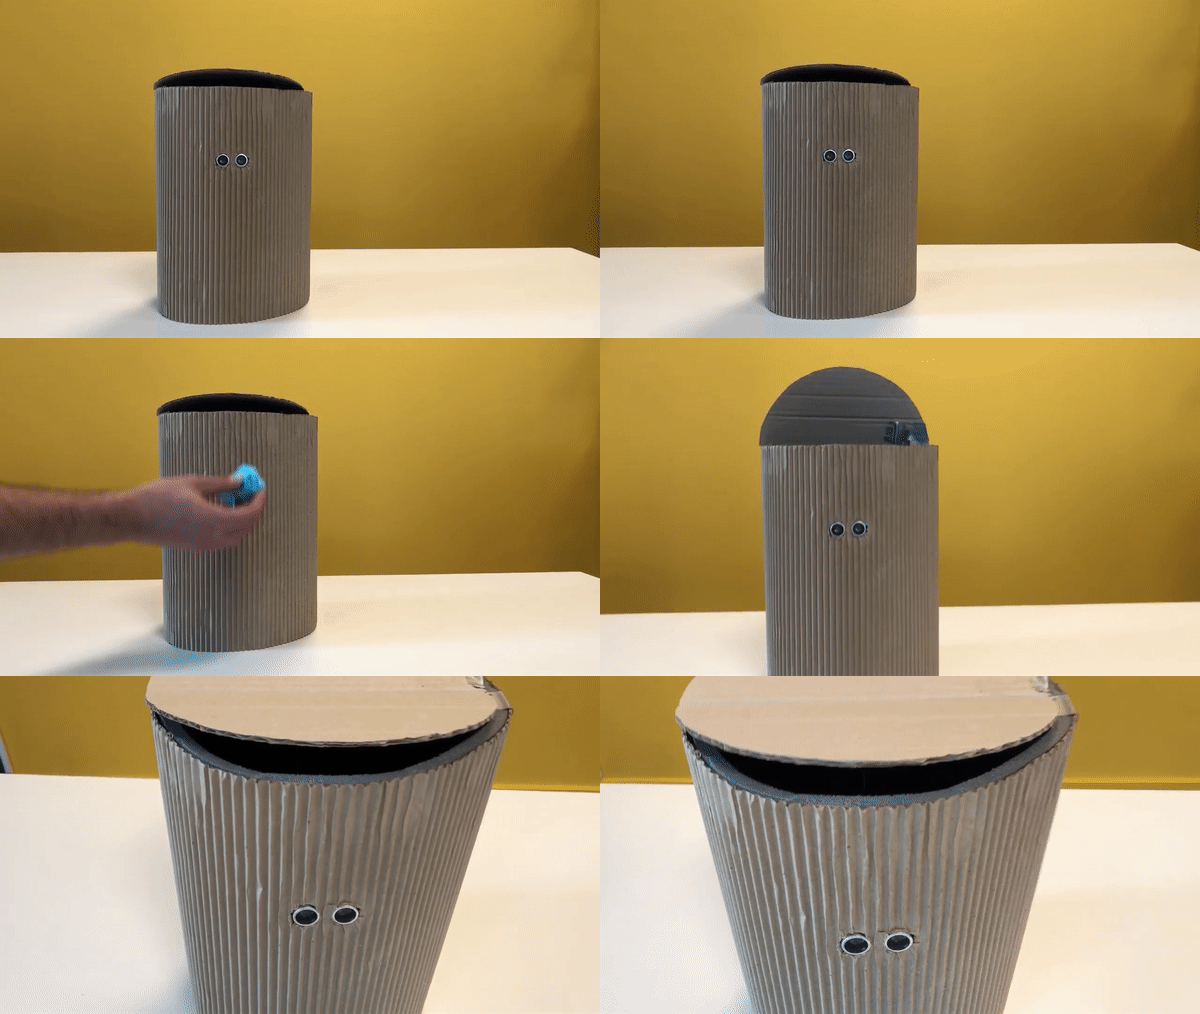
In EDUvision Season 3 Episode 8, we demonstrated a project that utilizes an ultrasonic sensor and a servo motor to create a self-opening trash can.

Materials needed
- Ultrasonic sensor
- Standard Servo motor
- Arduino board
- Breadboard
- Jumper wires
- 2x 9 V batteries + battery snaps (power the Arduino and servo motor separately)
- Different crafting materials, such as cardboard, foam, tape, scissors

Ultrasonic sensor
The ultrasonic sensor uses the same system that bats use to orient themselves. They send an ultrasonic sound and keep listening until the sound comes back. In this manner, they can detect their distance from the object.
Pins:
- VCC: With this pin we will power the sensor.
- Range: This pin allows us to select the distance and precision of the sensor.
- Out: Through this pin, the sensor will show us, with a voltage variation, the measure taken.
- GND: This is the ground pin of the sensor.
Standard Servo Motor
Servo motors are actuators that allow for precise control of position (angle) or angular velocity from a microcontroller. The most common servo motors are standard servo motors and continuous rotation servo motors.
The main characteristics of standard servos are:
- The shaft can only turn from 0 to 180 degrees.
- They will keep the position of the shaft in a specific position until we program them to move the shaft into a new position.
Pins:
Servo motors have three terminals: one for ground (black), one for power (red), and one for the control signal (usually orange or white).
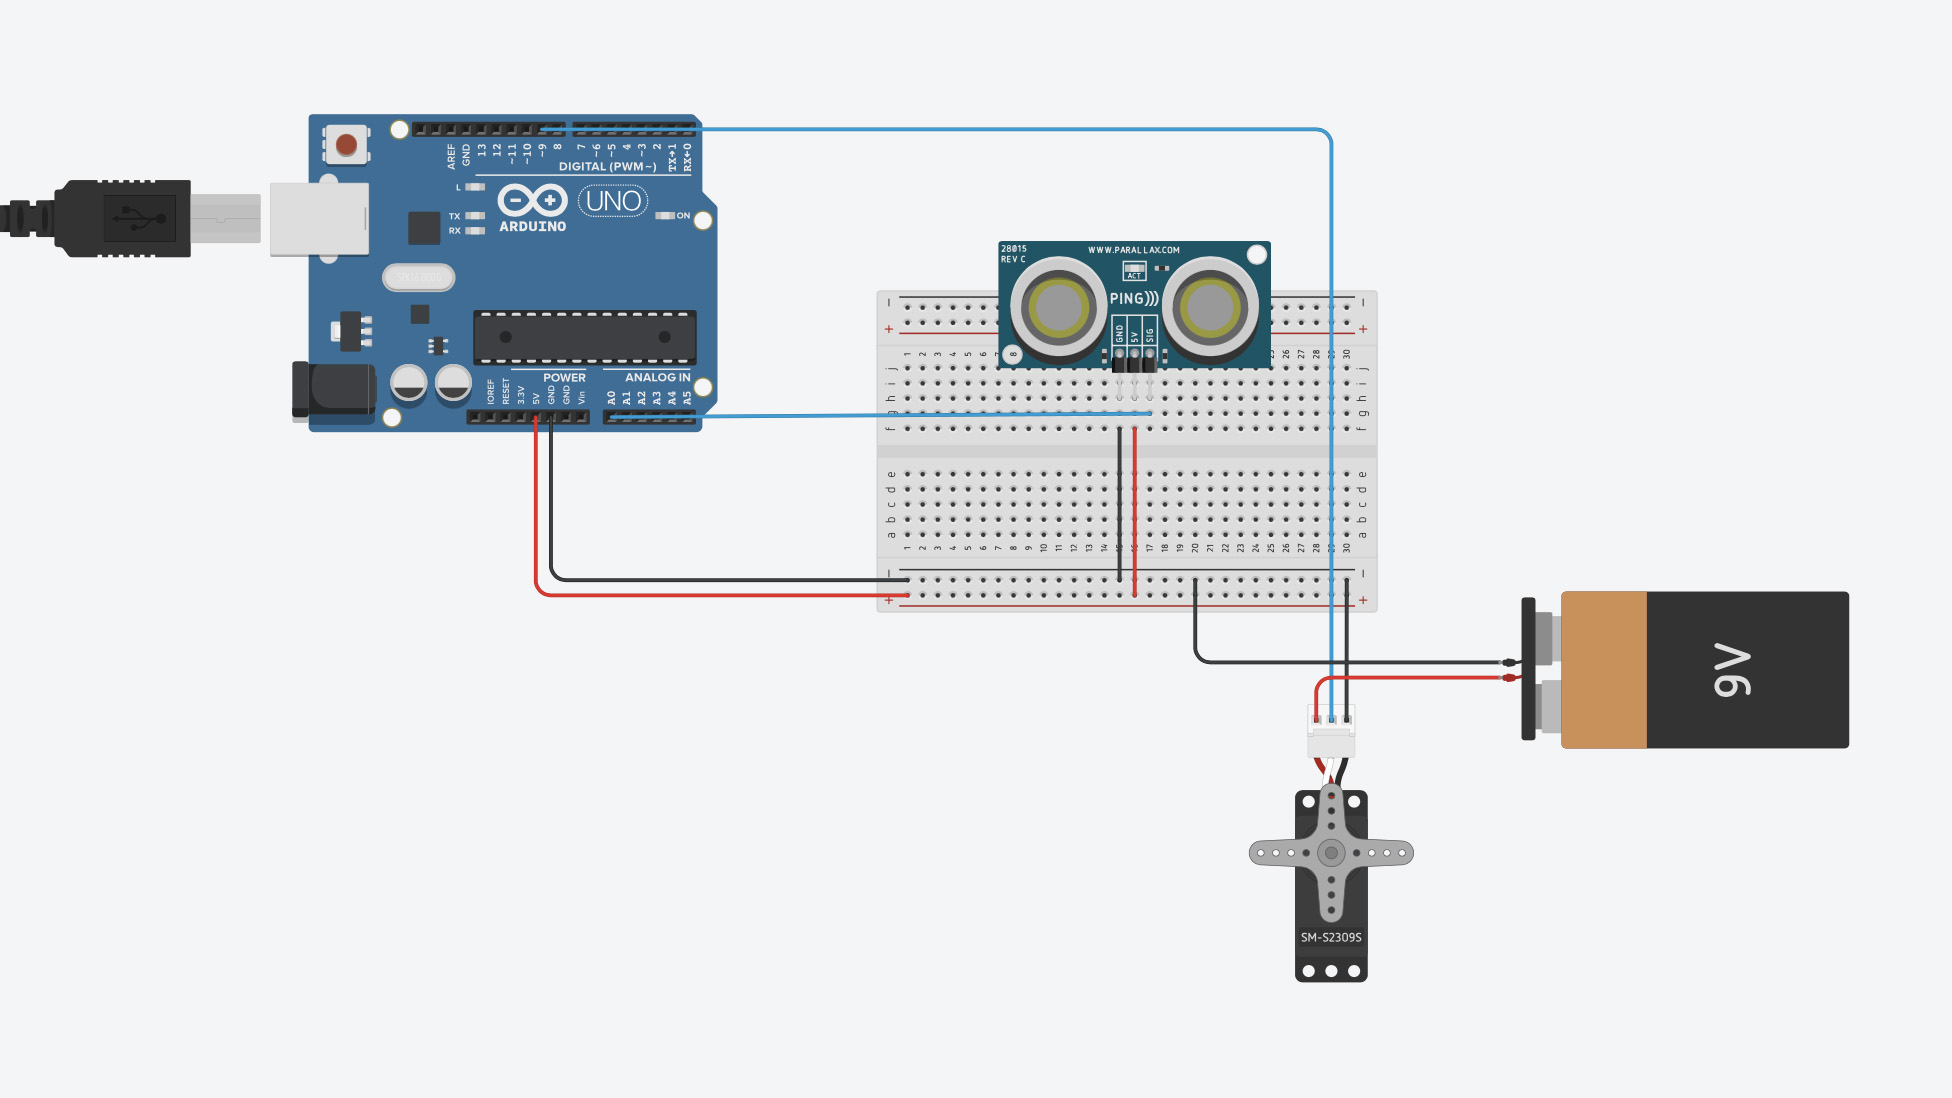
Wiring

Code
Arduino Sketch
unsigned int ADCValue;
#include <Servo.h>
Servo servo;
int servoPin = 9;
int pos = 0;
void setup(){
 Serial.begin(9600);
 servo.attach(servoPin);
 servo.write(0);
}

void loop(){

int val = analogRead(0); // Define and read the data from the ultrasonic sensor
  val = map(val, 0, 300, 0, 255);
   Serial.println(val);
delay(10);


if ( val<100 ) {
 for (pos = 0; pos <= 180; pos += 1) { // goes from 0 degrees to 310 degrees
   // in steps of 1 degree
   servo.write(pos);              // tell servo to go to position in variable 'pos'
   delay(2);                       // waits 15ms for the servo to reach the position
 }
}
else {
 delay(1000);
  for (pos = 180; pos >= 0; pos -= 1) { // goes from 310 degrees to 0 degrees
   servo.write(pos);              // tell servo to go to position in variable 'pos'
   delay(2);                       // waits 15ms for the servo to reach the position
 }
}
}
Test your project
Try out that the ultrasonic sensor and standard servo motor are working as intended. When you move your hand in front of the ultrasonic sensor the servo’s shaft turns and after one second it will go back to its original position. You can adjust the shaft’s position according to your project.
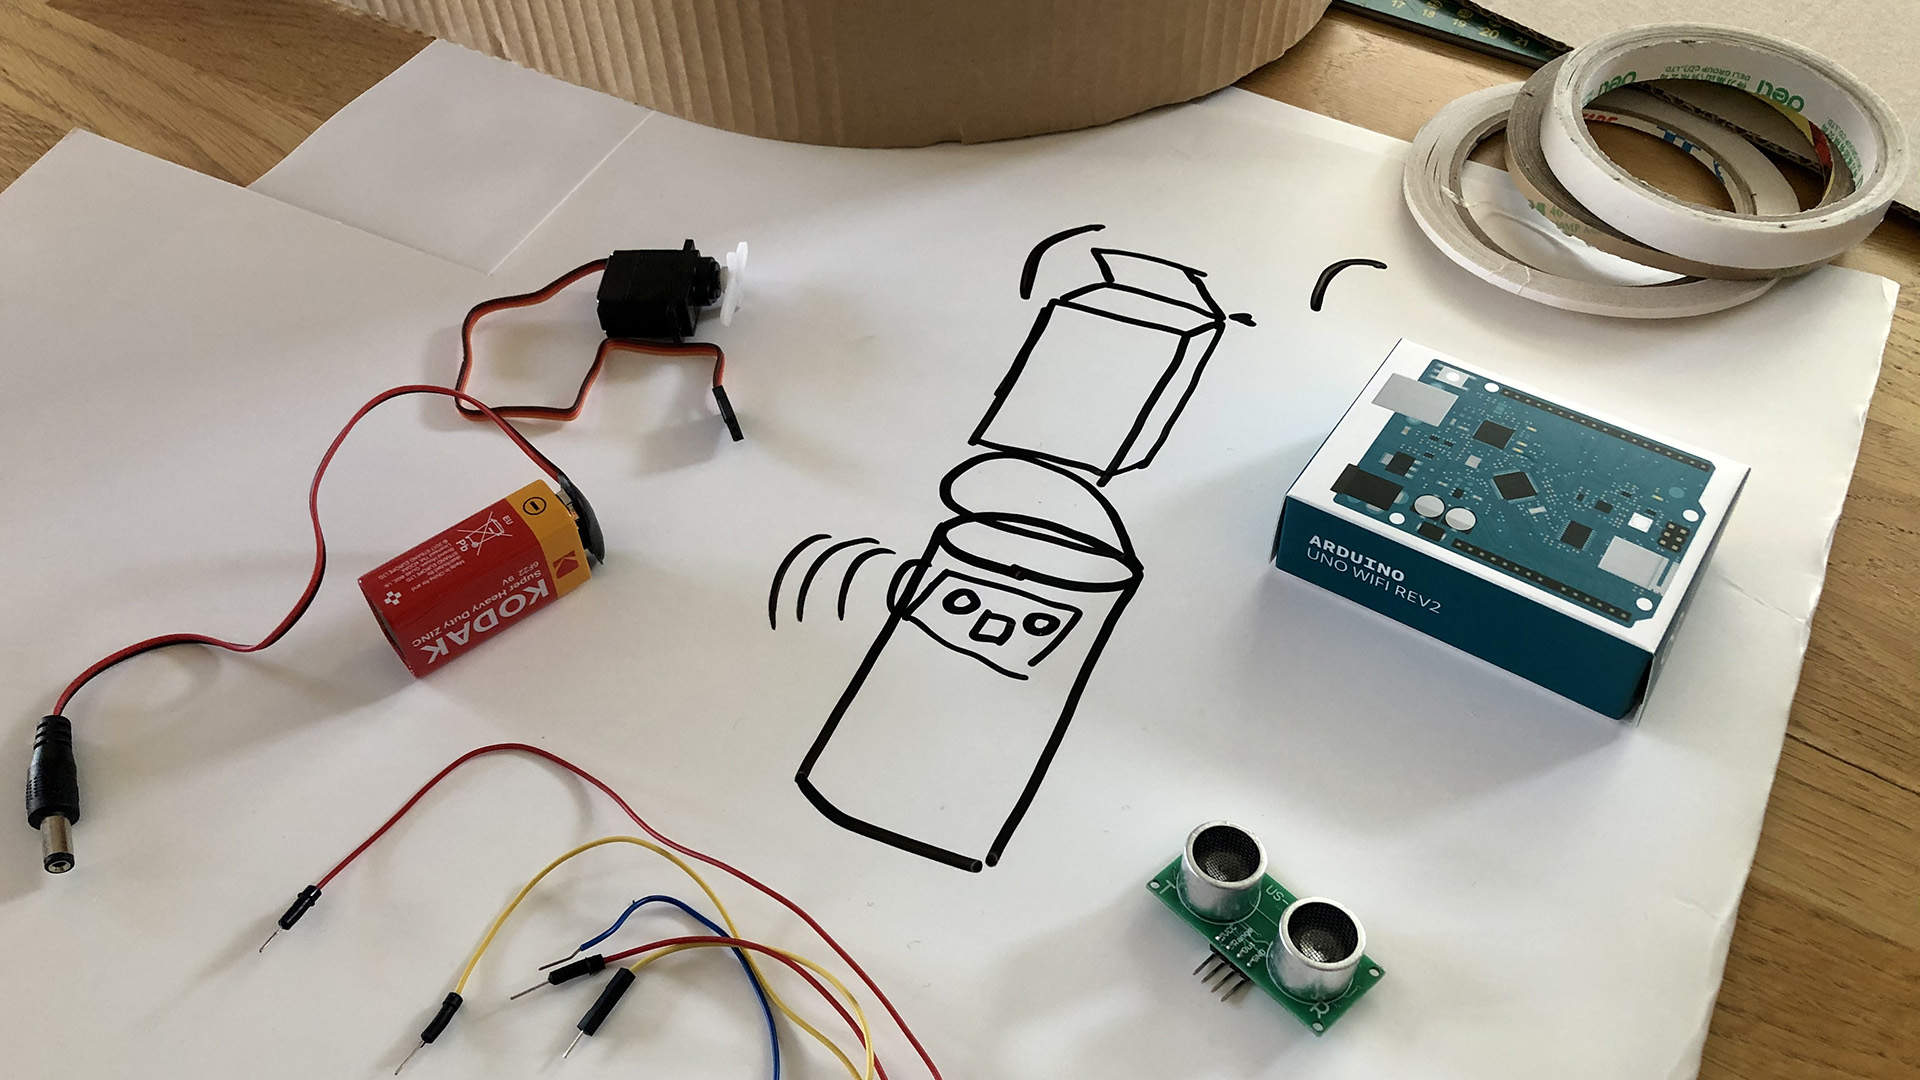
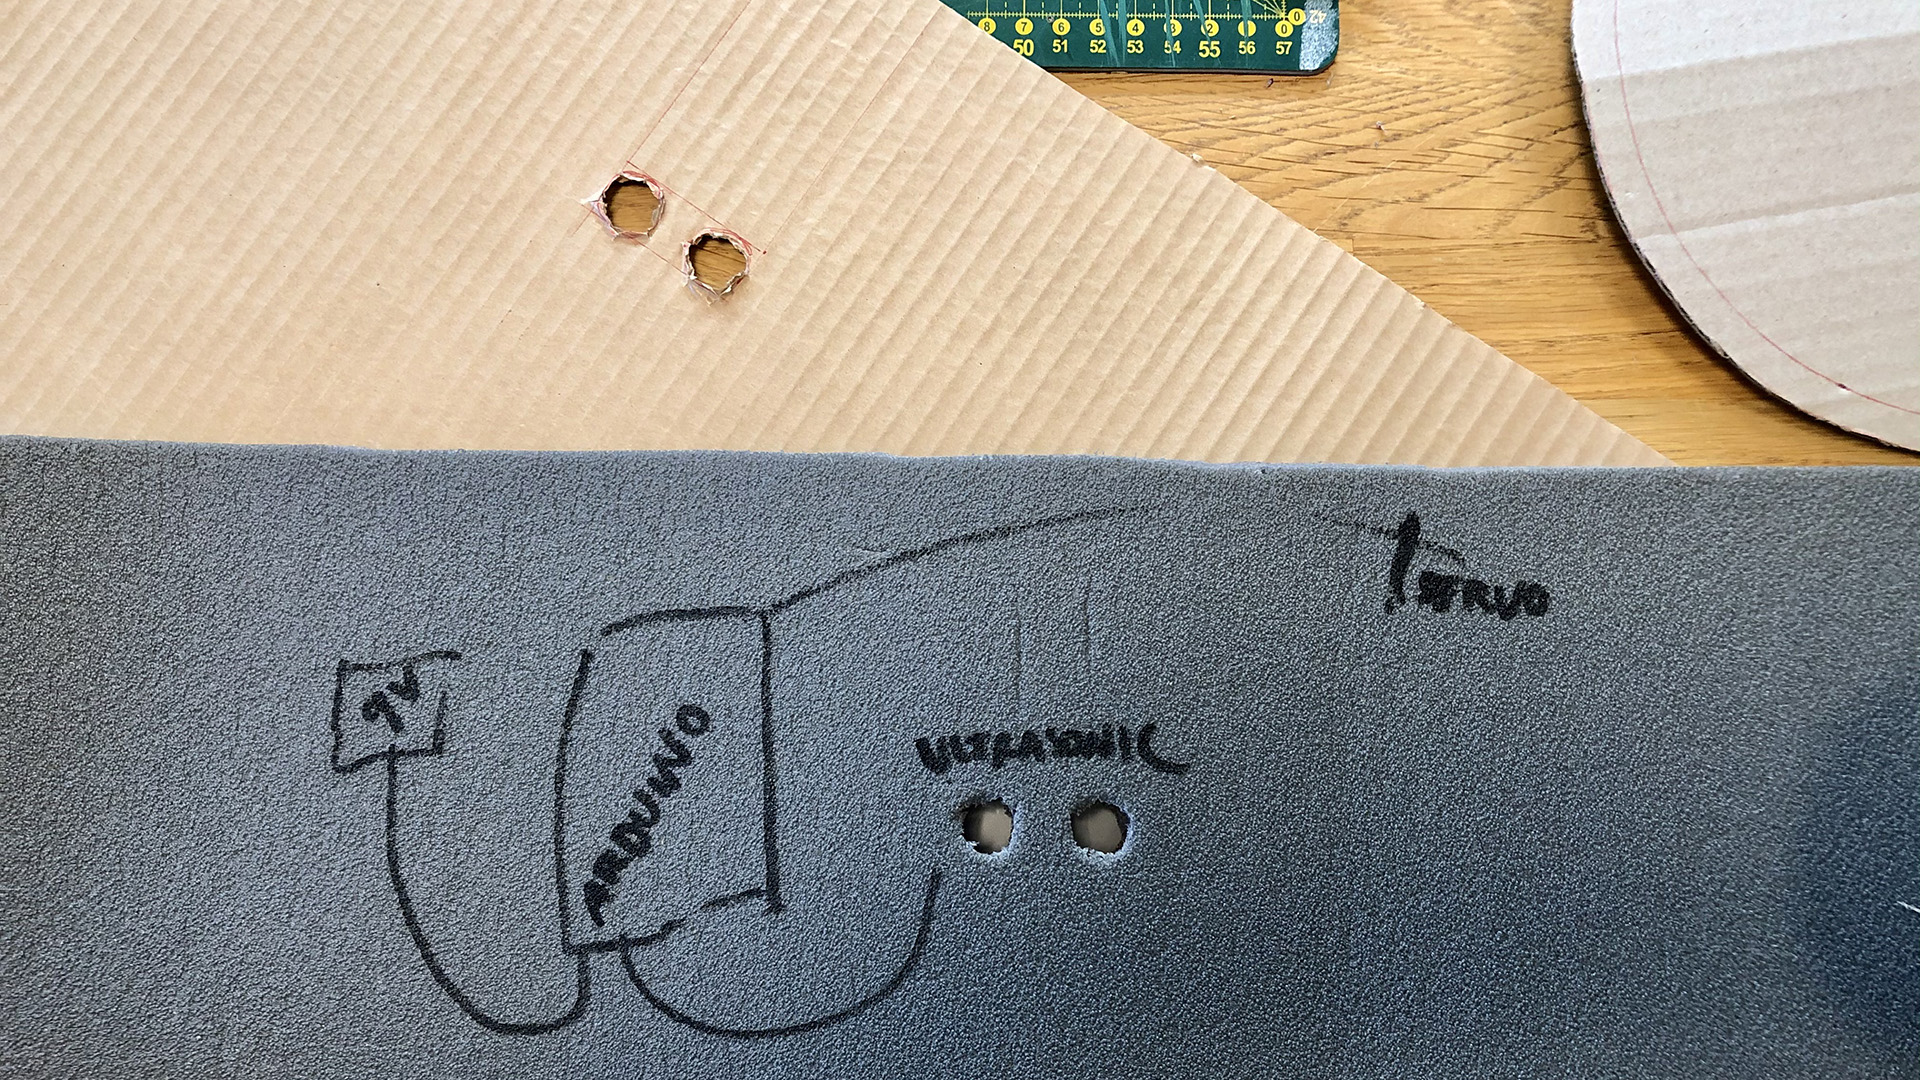
You can design your own trash can for this project. In our project, we used cardboard and a piece of a grey foam mattress. To the side of the trash can create holes for the ultrasonic sensor and attach the servo’s shaft to the lid. You can power the Arduino board with a battery to create a wireless project. In the picture below, is our plan and where we connected the different components.
